

How to Make a Dinosaur Valentine Box

I asked Wesley what kind of Valentine box he wanted for his party at school....
DINOSAUR.
He wanted a dinosaur Valentine box.
I should have known... is there any other kind??
So I did the good mom thing and start googling/pinteresting to find a tutorial for a dinosaur Valentine box. Pictures... I found plenty of. No matter what I clicked on, I couldn't find a tutorial. Because of that, I felt that I needed to create one.
Need two valentine boxes? Check out this Robot Valentine Box.
Here is how I made this super stinking cute dino valentine box...
Supplies needed:

construction paper
scissors
lots of tape (scotch tape, but you would also benefit having duct tape or packing tape)
rectangle tissue box
square tissue box
pipe cleaners- I used metallic. You can purchase them here!
stickers (optional)


Preparing The Boxes
The first step is to cut your tissue boxes. The dinosaur is going to be standing. You need the valentine cards to get in somehow! So, go ahead and take out all of the tissue!
Cut out one end of the rectangle tissue box completely out. Do the same for the square tissue box.
On the square tissue box you want to use the top of the box (where the tissue comes out) to create a dinosaur mouth. I cut a rectangle out of the top, leaving some box to create "lips." I also cut a "V" shape out of both sides.

Next, fit the boxes together and tape them in place. Mine didn't fit together perfectly. But, that didn't matter. I used packing tape here, because I wanted it to be extra sturdy. I didn't need my child hating Valentine's Day for life because when he was his Kindergarten his dinosaur's head fell off.


After the head was secure, I wrapped the entire structure in green construction paper. I used clear scotch tape for this (and the rest of the project).
Decorating
The next phase was the most fun, because I actually got to create the dinosaur. Don't be scared to get creative and add your own special touch.
I made a funny little arm and used that arm to trace and cut out a second similar arm.The legs were built the same way. Again, I used tape to secure them, but this time I rolled the tape and stuck it between the arm/leg and box.
The heart was taped between the hands using rolled tape also.
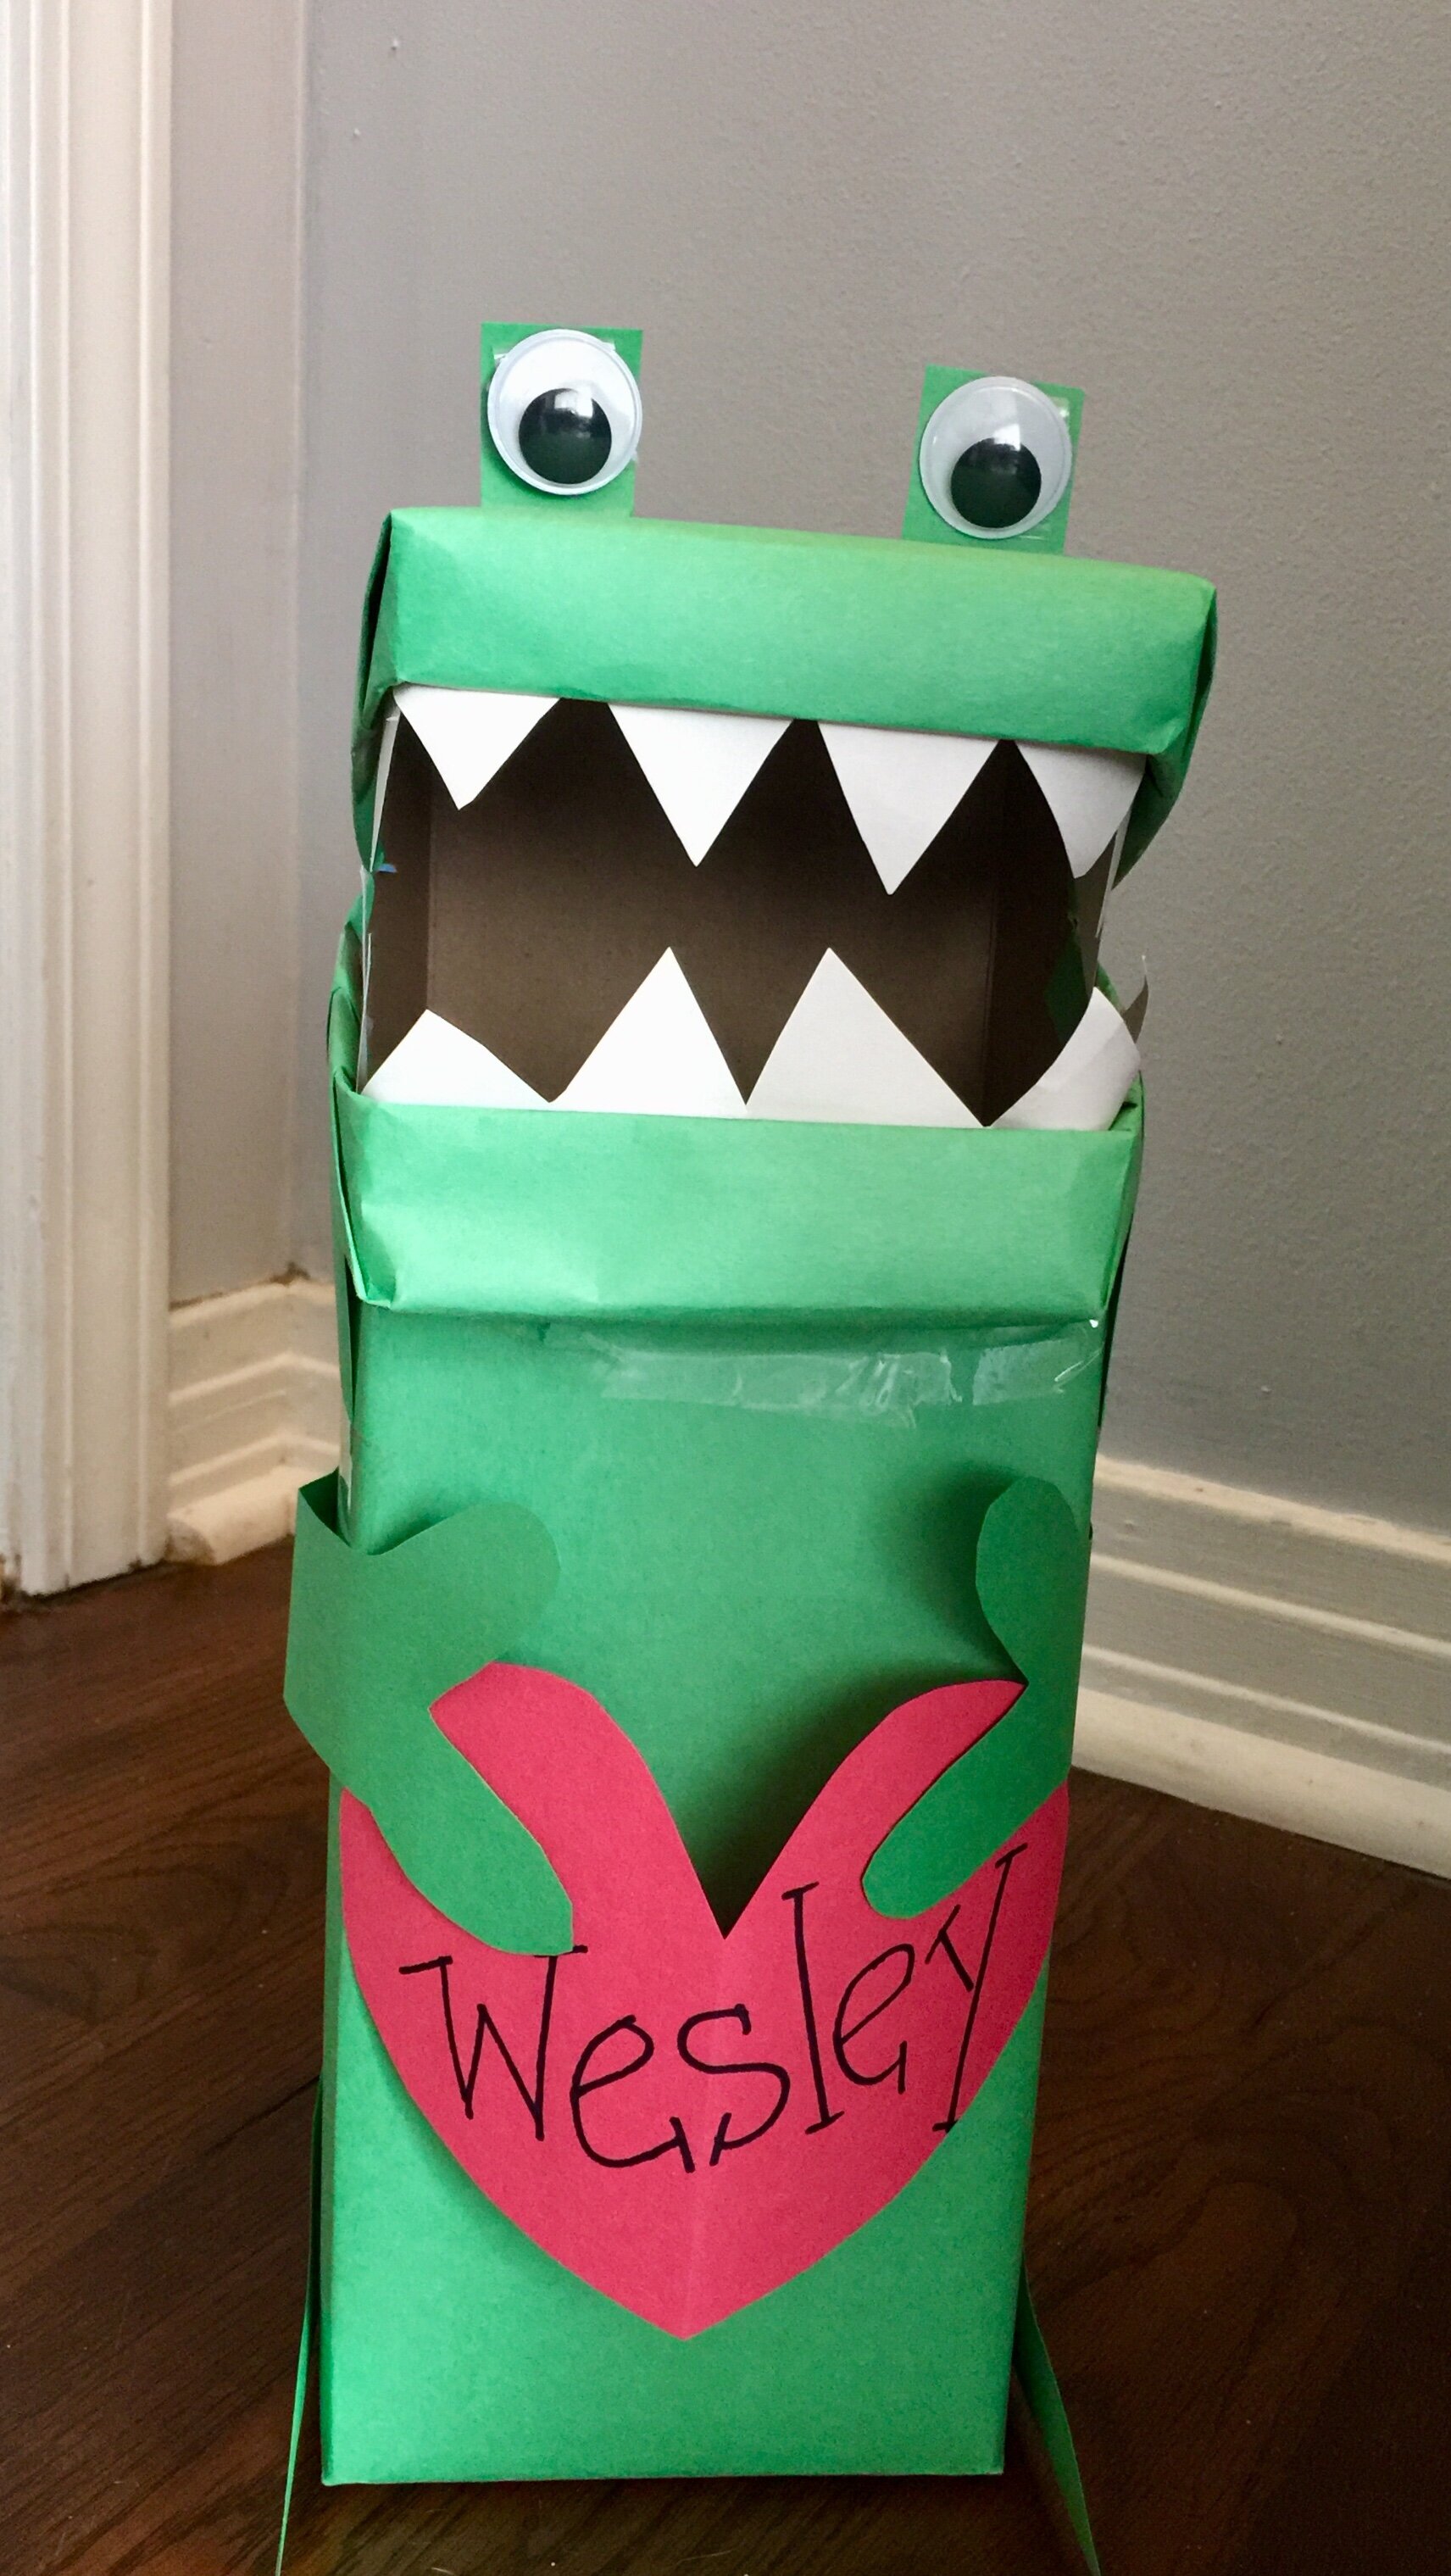
The tail was super easy. I rolled construction paper into a cone and taped it up! I did cut about an inch off the open part of the cone, so that it would sit flush against the box. To secure it... you guessed it... I used tape!

Use two pipe cleaners to create spikes on the back and tail. I squiggled them and taped each end to secure them.
White construction paper was used to make the teeth. Make it easy for yourself. Don't trace, measure, or draw. I simply made two strips of connected triangles and taped them in.
Finally... I added the eyes and let Wesley put on the stickers!

Didn't it turn out great?!?!
Let me know if you have any questions. I'm happy to answer them!
After finishing this, Wesley and William helped me make Valentines for their classes. I asked Wesley if he had asked his girlfriend to be his Valentine yet?
Wesley: "Yes, and to marry me!"
